[Updated Feb 24th 2019 with minor updates to start gcode]
[Updated Nov 18th 2018 with minor updates to the end gcode]
[Updated Nov 8th 2018 with feedback from Brook Drumm]
You can easily print with Simple Pro from Cura running on your computer. You can also use Octoprint (I do this with my printer connected to a Raspberry Pi).
When you are printing direct via USB, just ignore the touchscreen. It won't be aware of what the printer is doing, and interacting with the touchscreen can interfere with a print in progress.
Here are the steps:
1) Download and install the latest version of Cura from this link. (You can elect not to share personal information from the drop down that pops up.)
2) Launch Cura and add a printer. Expand "Other" and select Printrbot Simple. If you like, you can override the Printer Name to "Printrbot Simple Pro".


3) Open up Settings:Printers:Manage Printers and select the printer you just added. Click on "Machine Settings".
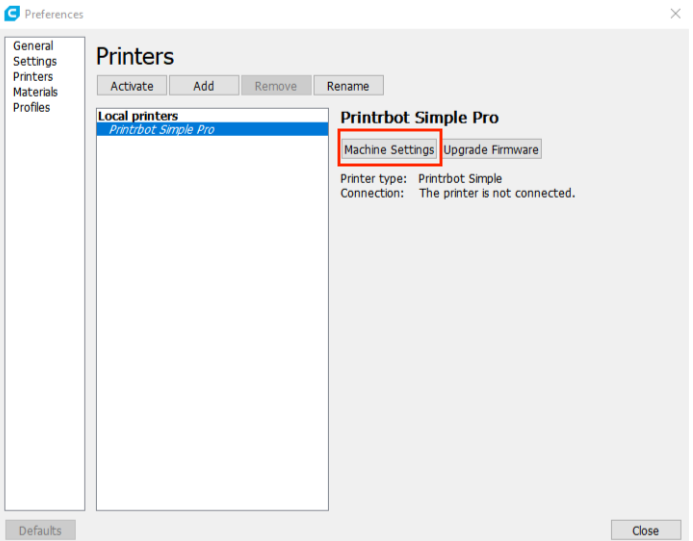
4) Update the print bed to 200x150x200mm. Erase the existing start/end gcode.

5) Paste the following lines into the "start gcode" text box. Thanks to Brook for updating the gcode to fix some issues! Take care not to insert additional linebreaks in this code. It will cause your printer to loop the startup sequence endlessly. If you want to copy and paste, grab the code here
(==Configuration Settings==)
G21 ;set metric mode - use mm as units
M100 ({{ysv:1000}}) ;slow y-axis homing velocity so it doesn't slam
M100 ({{4pl:0.6}}) ;this is setting the motor power level on the Extruder - motor 4 - to 60 percent so it doesn't 'click'
;skipping all other configuration. The stock settings should be correct
(==Home Printer==)
M100 ({{_leds:3}}) ;turn LED on, blue color
G92.1 X0 Y0 Z0 A0 B0 ;reset origin offsets on all axes -clean slate
G28.2 X0 Y0 Z0 ;home the x, y and z axes.
(==Level Bed==)
M100 ({{_leds:5}}) ;turn LED on, yellow color
;probe first point
G0 X0 Y145 Z6 F6000 ;travel to X=0, Y=145mm, Z=6mm
G38.2 Z-10 F200 ;slowly travel down until the z-probe activates
G0 Z5 ;travel back up to Z=5mm
;probe second point
G0 X210 Y65 F6000 ;travel to X=210mm Y=65mm
G38.2 Z-10 F200 ;slowly travel down until the z-probe activates
G0 Z5 ;travel back up to Z=5mm
;probe third point
G0 X=0 Y=10 F6000 ;travel to X=0mm, Y=10mm
G38.2 Z-10 F200 ;slowly travel down until the z-probe activates
G0 Z5 ;travel back up to Z=5mm
M100 ({{tram:1}}) ;set the bed height based on the probe values from the three previous G38.2 commands
(==Z Offset==)
G0 Z5 ;make sure we are at a decent Z height
G92 Z7.0 ;set Z-axis offset ;** REPLACE THIS WITH YOUR OFFSET **
(==Heat==)
M100 ({{_leds:2}}) ;turn LED on, red color
M109 S{material_print_temperature} ;start heating hotend, wait until temperature hits
(==Prime==)
M100 ({{_leds:1}}) ;turn LED on, white color
G92 A0 ;reset extruder origin
G0 X10 Y10 Z0.3 F6000;travel to X=10mm, Y=10mm, Z=0.3mm
G1 X200 A12 F1200 ;extrude 12mm of filament while moving to X=200mm
G0 Y0.4 F6000;travel to Y=0.4
G1 X110 A18 F1200;extrude 6mm more filament while moving back to X=110mm
G0 Z1 ;raise to Z=1mm
G92 A0 ;reset extruder origin
(==Print Gcode Starts Below==)
6) Add the following gcode into the "end gcode" text box.
M104 S0     ;extruder heater off
G91         ;relative positioning
G1 E-1 F300 ;retract the filament a bit
G1 Z+1 E-5 F9000 ;move Z up a bit and retract even more
G28.2 X0 Y0   ;home X/Y, so the head is out of the way
M84         ;steppers off
G90         ;absolute positioning
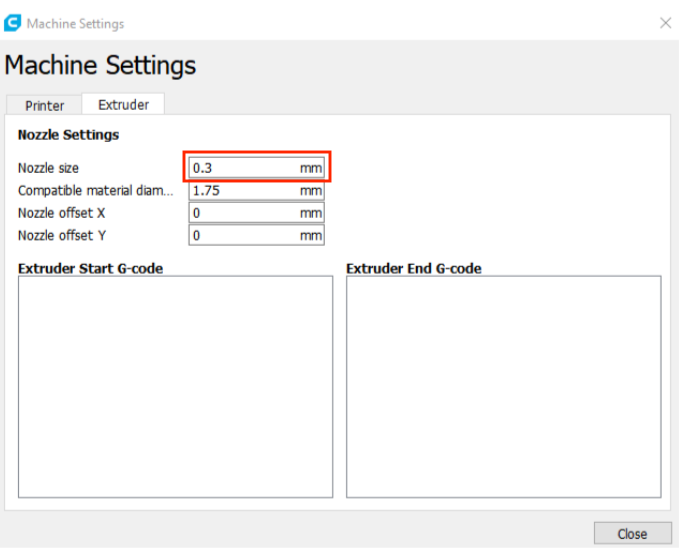
7) Click on the Extruder tab and change the nozzle to 0.3mm.
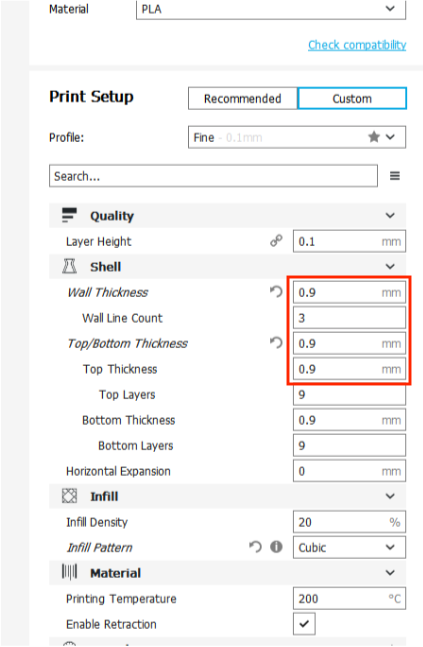
8) In the main Cura window, change your wall width to a multiple of the nozzle size. I used 0.9mm, but 0.6mm is also a very good choice.
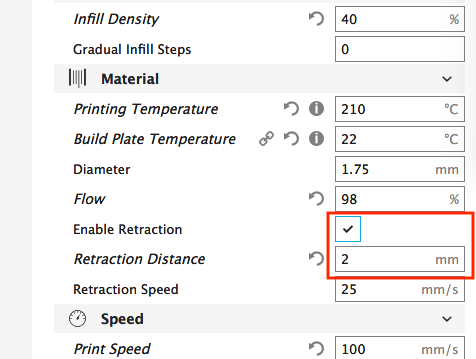
9) Go to the "material" settings area in Cura and turn on the retraction setting option. Set the retraction distance value to 2.0mm
9) You will probably want to run your first few prints at "low" or "draft" quality. Despite what the presets say, the quality when printing in Draft is very good, and will save a lot of time on your prints.
10) Load a file in Cura and print. To print from Cura, plug in the printer to your computer via the USB port on the side. Cura should recognize it, and you can change the "save to file" button to "print from USB".
11) You'll find that your first print is probably way above the print bed. You'll need to calibrate your z-offset. To do this, open up Settings:Printers:Manage Printers and click Machine Settings again (see step 3). In the 'start gcode' section,change this line:
G92 Z0.1 ;set Z-axis offset ;** REPLACE THIS WITH YOUR OFFSET **
For my Simple Metal with a heated bed, I use this:
G92 Z9.6 ;set Z-axis offset;
If you don't have a heated bed, your height adjustment may need a much smaller value. The easiest way to calibrate this is to start a test print, stop the print once it starts printing the first line, and measure the height of the print nozzle from the bed.